Tubular Italian cast on tutorial on 1/1 rib
your work using Tubular Italian cast on.
At first I'll do it with P1, K1 ribbing as en exapmle.
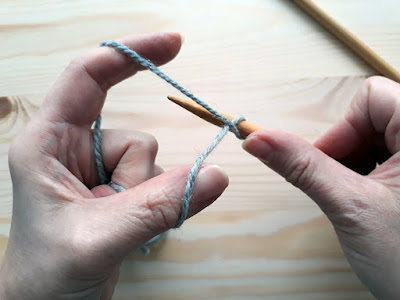
Wrap the yarn around your fingers as you'd do for Long tail cast on.Make a loop = purl stitch,put the needle under the tail of yarn (located at Thumb finger).
Put the needle over the working of yarn (located at Index finger). To create knit stitch, bring the yarn under the tail of yarn (located at Thumb finger).
Knit stitch has just been created.
Again to make a purl stitch put the needle under the working yarn...and over the tail of yarn,
Bring the yarn through...
Purl stitch is formed.
This is how beginning row should look like.
In the next two rows there will be combination of slip and knit stitches, to form flexible edge.
Knit next stitch.
Slip as if to purl.
Contiune to slip and knit to the end of row.
Now you are ready to begin working the ribbing: P1, k1.
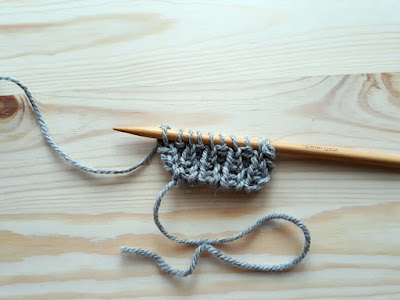
This is a result of Tubular Italian cast on with P1, k1 ribbing.
Now let me show how to work with K1, p1 ribbing.
Place the needle under the strand of yarn.
Move the needle under the working yarn (at Index finger),
and then over the tail of yarn (at the Thumb).
See purl stitch created?
To make a knit stitch put the needle under the tail of yarn, and then over the working yarn.
Repeat moves for purl and knit entire row.
Then make next two rows as follows:
*Knit 1, slip 1 as if to purl; repeat to the end of row.
Now you are ready to work the ribbing K1, p1 for desired length.


Komentarze
Prześlij komentarz